Monday, 30 July 2012

From A - Back in the Saddle

Or at least back at the sewing machine. We made it home from our trip yesterday and I spent most of the time I should have been sleeping (I hate jetlag) sewing.

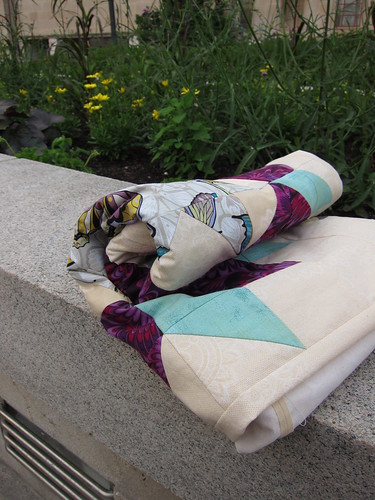
I managed to finish making all of my blocks for the Zig Zag Baby quilt, press them, and trim them to size.


Although I probably should have attempted sleeping at this juncture, curiosity got the best of me and I decided to stay up and piece a couple of rows together to make the first zig zag section.


I think this quilt will fly along now that I've got the blocks made and finally have some time at home with my machine. My vacation was amazing but it feels great to be back!

Friday, 27 July 2012

From K - Desperately seeking a design wall

Tonight my hubby helped me take the first steps toward building my new design wall, and I couldn't be more pleased to get it started. One of the fundamental reasons why I was so desperate for my own craft space was to reduce the fabric explosion that currently invades my living room. Somehow a couple small fat quarters migrates into the room, followed by a  multitude more, and then it all decides to reside there for weeks on end. Having guests over means there is no longer a simple requirement to tidy up, but instead it creates the need to pack it all up or learn to entertain around it.

Now that I have my own dedicated craft room I thought this phenomenon would die out, but little did I know that even with a new space, fabric still continues to spread. Here is a photo of my new convertible sofa in our guest/craft room...


It looked like that for a couple of days before my wax print quilt required more space... so now it's begining to look more like this...


For a while now I've had a significant portion of my squares cut to create this next quilt top but no space that is large enough to maintain it all laid out together at once. I'm getting desperate for a design wall now to ensure the colors are balanced properly before I begin to sew it together. The picture below shows some of the green fabrics that I've cut so far (unfortunately this couch doesn't have room for all of the blues, purples, oranges and pinks).


Here's hoping we can polish this board off on the weekend so the rest of the colours can be laid out together.

Thursday, 26 July 2012

From A - The Good Life

The hubby and I managed to get away for a week and I'm happy to report that while enjoying this


I've been working away on my Spectra scarf.


I'm using some Madelintosh Merino Light in Curiosity for the garter stitch portion of the scarf and some Noro Taiyo Sock in colour 32 for the wedges. At this point, I'm about 1/3 of the way though.

There is something about self striping yarn that makes my heart pitter patter. Noro is especially lovely as the colours fade into each other as you knit along. Every time a new colour emerges, I guess how many wedges it will occupy and what the next colour will end up being. Sounds trivial, but it's enough to keep me knitting right along.

In another happy accident, I also stumbled across  yarn shop yesterday and picked up the largest skein of sock yarn I have ever seen. Coming in at about 900 yards, I think I might use this sunny bamboo/merino blend as as contrast colour for the Westknits Mystery Shawl. I bought the pattern but had a hard time finding the right yarn so I haven't started yet.


I also found my way to a quilt shop and picked up this. Batiks are never something I've been drawn to but the shop sample was impossible to resist. Any guesses on what this will  be?


The beach is calling. I'll see you all next week when I get home.

Tuesday, 24 July 2012

From K - Table Top Ironing Board Tutorial

Our family can easily be defined as being competitive... and had I of known Amanda's hubby was up to some crafty business this week I would have leveraged it to the max! You see unlike Amanda's husband's practical attitude toward paying a professional, my husband can't  stomach the idea of not building something himself... sometimes in what people might consider an extreme way. Just as an example to demonstrate my case, before I had even finished my very first quilt top, the hubs literally came up with a plan to build me a long arm machine... seriously, a long arm machine! I didn't even know what one looked like let alone how to use it but to this day he's still determined to make me one, and you know what... I just might let him someday!

But I digress, so back to the leveraging of husband-y craftiness...

Throughout my craft room renovation quest, my husband has been a tremendous support to me. Not only in helping gather supplies, but also in the design process and follow through on many of my projects. I have big plans for this sweet little crafty nugget of mine, and I am fortunate enough to be blessed with one handy husband to help me bring all of my ideas into fruition. Last night after laughing about how he would have completed one of these ideas last week (if for no other reason than to beat Amanda's hubs onto our blog),  he helped me polish off a table sized ironing board that I had been planning when the idea for a craft room makeover was just a seedling of thought. Here is how we made it happen.

Simple Table Top Ironing Board Tutorial


Materials Required:
  • Plywood Board (cut to 30.5 x 32 inches) with sanded edges
  • Short upholstery staples (shorter than your plywood thickness)
  • 1.5 yards of home dec weight fabric
  • 2 yards of batting
  • 1 yard of thinsulate
  • 0.5 yards of jiffy grip fabric and spray adhesive (optional)
Step 1: I have a fairly large table in my new craft space for a dedicated work station for both cutting and ironing. To maximize the pressing side of the table, I asked the hubs to cut me a board 30.5 x 32 inches. Due to the weight and size of such a board, he suggest we use 3/8" plywood. (Note: a handy husband was useful in my case, but is in no way required for this task - your local hardware store should make 1-2 cuts for free if you purchase your board from them).

While the hubs cut the board and sanded the edges, I cut 2 layers of batting, 1 layer of thinsulate and 1 layer of fabric, being sure to leave roughly 4 inches of extra fabric on each side. Once we had our materials prepped, it was off to the garage to use the air stapler and air compressor (Note: for these next steps a simple hand staple gun would suffice).


Step 2:  Layer the batting and thinsulate layers over the pre-cut plywood (thinsulate layer on top). Now flip the project upside down so the bottom of the plywood faces up. Pulling the layers taught and starting in the middle of one edge, staple along one entire side of the board (stapling every 3-4 inches). Once one side is complete, pull the layers smooth and staple the opposite side of the board. Continue this process until all four sides are complete.

Step 3:  Using a utility knife, rotary cutter or some sheers, trim back the excess batting and thinsulate so the back of the board is smooth (I appologize for the poor picture quality as we were in a dark garage at night).

Step 4: Center your board on top of your home dec fabric (both good sides down). Pulling the fabric around the board to the back, staple the fabric using the guidelines in Step 1. For this step it is important to note two things: a) you want to make sure if you are using a directional or geometric print that your pattern is straight at all times; and b) unlike Step 1 where you staple the side of the board, in this step we will staple fabric directly onto the back of the board.


Step 5:  Lay the excess fabric at the corners as flat as possible and staple them down.


Step 6(Optional)  Because my table top ironing board is going to rest of a glass table top I wanted to make sure it wouldn't slide around. To help give it some hold on the table, I used some remnant fabric, along with some white jiffy grip fabric to cover the bottom of my board. To adhere this layer I used some all purpose craft adhesive spray however the verdict is out on the level of hold it will provide. I may be heading back to the garage for some staples instead (not as aesthetically pleasing but more functionally sound, and after all it's the bottom of the board).


Step 7:  Set up your board, plug in your iron, and enjoy!


I hope you have enjoyed this mini tutorial and find it useful. I know already how much I am going to love this mega sized board, and I can't wait until I need to press my next quilt top. Ahhh the joy that will be had!

Saturday, 21 July 2012

From A - Crafty Husband Vol. 1

My spouse is a person of many talents. That said, I'm the DIY person in our relationship. In about 99% of cases, he would rather pay someone to do something "properly" than attempt it himself.

You can probably imagine my surprise when I arrived home from work at 10:00 p.m. last night to be greeted by full-out crafty mayhem.

Each summer, friends of ours have a backyard party. Calling it a "backyard party" is probably a bit of an understatement. The party involves tons of food, a softball game, horseshoe and washer toss tournaments, and a children's activity zone. The hosts have even had trophies made to record the winners for each event. This party has become a tradition for our family of 2 and this year, the male contingent of the household decided that he needed a jersey that would make him instantly recognizable as the "2011 wash toss champion" that he was.

Of his own accord, he went here and downloaded a jersey font and purchased some fabric paint and a paint brush from the local art supply store. He printed out the number and letters of choice in the desired size using Word.


The number was then positioned on the shirt and masking tape was used to painstakingly outline the text (my spouse is not a precision moment kind of person so this was a total shocker to me). For the tricky bits, he stuck a big chunk of tape on the shirt, traced the outline of the area to be covered with the pencil and then used scissors to cut the excess tape away.


I got involved at this point (who could resist!) and after throwing some scrap paper under the area to be painted, I slapped some paint on.


After leaving the paint for a few minutes, I did a few touch ups where there had not been enough coverage the first time around.


After some drying time, this was the end result. I'm impressed at how little paint bleed occurred with the masking tape. My hubby is pleased as punch with his craft project. Next time, he said he would position the number a little higher under the name.


From my side of things, I managed to get all of the fabric washed, pressed, cut, pinned and marked for the zig zag baby quilt top. If I could find a few minutes in front of a sewing machine, I might actually have something to show you soon!


Hope you're all enjoying your weekend.

Wednesday, 18 July 2012

From K - Easy burp cloth tutorial

While I have continued to plug away at my first of two wax print quilts this week, I took a quick break today to start working on one of my other summer to-do list items - baby gifts! Tomorrow is my last appointment with my long term massage therapist before she begins her mat leave (yay Canada for health insurance and mat leave!) so I wanted to make her a simple but practical gift. Burp cloths are quick to make and easy to customize so I took the chance to whip a couple up.


There are a ton of tutorials floating around the Internet for this type of project so I won't bore you with too many photos but I will provide you with dimensions that I find practical.

I cut two pieces of flannelette 27 x 10.5 inches. On the white lining of my burp cloths you'll notice that I have sewn in a third piece of flannelette down the center for extra absorption. This center panel is cut to 19 x 4.5 inches. On my burp cloths I used a white lining but feel free to use any flannelette you'd like.


To begin construction, simply iron down a quarter inch seam allowance along the entire center panel and pin it into the middle of one of your burp cloth pieces (tucking the seam allowance under and out of sight). I used a simple zigzag stitch to adhere it to my burp cloth but feel free to use a fancy stitch if your machine has the capacity and you have the extra time.


Now that you are down to two flannelette pieces, pin the fabric right sides together. Sew around the edges using a quarter inch seam allowance but be sure to leave a 3-4 inch gap at one end. Using the gap you left open, turn the burp cloth right side out and use a chopstick to push out the corners. Press the cloth flat using a gentle iron, and sew along the perimeter of the burp cloth (close to the edge to ensure you catch the seam allowance that is folded inside).


These make a cute and simple gift that can be tailored to anyone's style. I think my massage therapist will love them.


Monday, 16 July 2012

From A - Making lists

Since finishing the baby quilt and getting my Swoon quilt basted, I have found myself a little direction-less on the crafting side of things.

In the last week I've picked up and put down old projects, started new projects and have dreamed up about a hundred more. Despite this meandering, I can't seem to buckle down and make any meaningful progress.

Inspired by Kelsey's crafty To Do list, I decided to put together one of my own. In addition to the hand quilted baby quilt mentioned here, I'm hoping my summer will look a little like this:

1) Get some knitting done. I really like to knit. I went through a few years where I knit almost exclusively. I haven't really touched the needles since finishing a baby gift for a friend back in February. Last April, I bought a shawl kit and decided that it was just the right thing to spur me on.


2) Make a Wiksten Tank or Two. I ordered both the Wiksten Tank and Tova patterns from Jenny back in early February. Both patterns have been sitting untouched in my sewing room ever since. I recently bought some gorgeous Martha Negley feather fabric and some Liberty Tana Lawn thinking I would use the feathers to make a wearable muslin and use the tana lawn to get over my fear of cutting into a prized piece of Liberty goodness.(Finished #1 and #2)


3) Make a Baby Quilt. With most of my friends having their first child this year, it really has been another month, another baby. In an attempt to keep up, I'm hoping to slap together a simple and sweet quilt for a baby boy to be. Like most things that are sitting stash-side, I bought the pattern some time ago and have been trying to find the right mix of fabrics to make it with. I found a fat quarter bundle that I loved over at Pink Castle Fabrics. I thought the colours screamed little boy. I can honestly say that I would have never thought to pair these colours together. Another reason to love bundles. I think it will be perfect. After I receiving the bundle, I added some fabrics and swapped out almost all of the oranges provided in favour of something a little more vivid. (Finished!)


4) Work on some quilting. I've always had a few follow through issues with crafts. With knitting, it is the finishing stage, blocking things and weaving in all the ends. When it comes to making quilts, I seem to always get tripped up, sometimes for months, when it's quilting time. I have two large quilts basted at this point. The first is my Swoon quilt and the second is a cute little number I basted just before starting this blog. I'm really hoping to get some of the quilting done on these so I can get the binding on them and start enjoying them.


5) Next up is a receiving blanket using this tutorial from Anna Maria Horner's blog. I bought enough flannel and voile to make about 6 of these sometime last winter in a period of baby gift desperation. Here's hoping I get at least one of them finished up this summer. (Finished!)


So how am I doing with the list? So far so good. I started working on some knitting and the zig zag baby quilt fabrics are in the wash.


Stay tuned.

Saturday, 14 July 2012

From K: Prep for a cold-ish week ahead

This past week in western Canada has been sooooo HOT and I don't know about you, but when it's hot and my house is without AC, I definitely limit my indoor exposure. At the expense of my craft room reno and planned sewing projects, I spent most of my time this week outside in the sunshine. Up here in Canada summer doesn't last for long so I figured this week I should enjoy it. With that being said though, I did my best to prep, plan and get supplies for the craft room reno, as well and begin the start of cutting my first of two wax print quilts.


I've had a really hard time starting my wax print quilt for the past few months now. Knowing that the opportunity to get fabric straight from Ghana again in the future is an unlikely event, I have worried about wasting what little stash I have.


This week I decided to make a plan and just jump right into preparing the first quilt top. Katie from Sew Katie Did posted last fall about scrap quilting using magic numbers. I thought this might be the best 'structured but still somewhat unstructured' way to tackle these vibrant african prints. The above photo shows the beginnings of some prepped squares that I plan on sewing up soon.


This upcoming week looks to be more temperate so here's hoping I can bare the thought of sitting indoors long enough to start up my Janome. In the meantime I'm saying goodbye to my vibrant purple guest room in order to make way for a fresh, modern sewing space!

Thursday, 12 July 2012

From A - Taking the Long Way

A good friend recently had her first child. She and her husband love Toronto. When they were married a few years ago, their wedding invitation was a beautiful hand drawn Toronto skyline, made by the groom himself.

It has been very difficult to buy her a gift since she really isn't into baby "stuff" and she really doesn't like animals. An interesting combination since basically everything made for babies is both cutesy and covered in animals.

After turning the gift problem around in my head for a week or two, I realized that I wanted to make them a hand quilted, whole cloth Toronto skyline quilt.


My friend loves the colour green so I picked out some amazing shot cotton in a gorgeous emerald colour for the back and a soft white print from Lecien for the front. I chose four different colours of hand quilting thread in shades of green and turquoise.

I drew an image of the skyline on tracing paper and transferred it the quilt top.

I hand basted the quilt together and now, after about 6 months of prep work, I am finally ready to start quilting it.

This project is a bit of a personal Everest for me. It is the first time that I have made my own pattern from scratch and the first time that I've done any hand quilting. I'm sure that it is going to be wildly time consuming but extremely satisfying.

I'm really hoping to get it finished before the end of August. If I can figure out how to manage an 11" x 17" Q-snap frame, scissors and thread on the plane then I might actually get it done. Wish me luck!

Monday, 9 July 2012

From K - Finished: Star Crush Pillows

This past weekend we hosted a couple of great friends who came through town. Lucky for them the stars aligned and they had the pleasure of enjoying the last stay in our current guest room before 'Project Craft Room' (as i know lovingly call it) initiates tomorrow. In the meantime I'm pleased to say that the stars aligned for me this weekend too, that is, in the form of finding the time to complete both of my star pillows. Punny I know, but all joked aside I'm pretty pleased with how these pillows turned out.


I can't seem to get enough of Anna Marie Horner's Innocent Crush line, so I have incorporated a couple of my favorite prints from it in these pillows. My previous post provides a full listing of materials used in these pillow tops.


When I needed to decide on a binding I was torn but in the end I'm really glad I incorporated more of this red/pink print.


When hand binding I always like to use office binder clips to hold binding about a foot down from where I'm working (in this photo I am working left to right). These clips were bought at a local dollar store and they have revolutionized hand binding for me.


For the pillow backings, I used a traditional linen and I love the contrast in materials. The tops give these pillows a polished appearance while the backings ensure they still maintain a relaxed style.


I quilted within the star profiles of each pillow to emphasize their shape using straight line quilting. On the border I added extra texture by using a dense stipple meander. Unfortunately the cream thread I used doesn't show up prominantly against the Michael Miller Antiquity Old Script print but trust me, it's lovely.


I just got home from picking up paint for my new craft room and I can't wait to start painting it later this week. I have no doubt these pillows are going to look great in there once it's complete.

Friday, 6 July 2012

From A - Half a Swoon

I've been off work and away on vacation this past week. After some quick negotiating with my significant other, I packed my sewing machine and the fabric for my Swoon quilt.

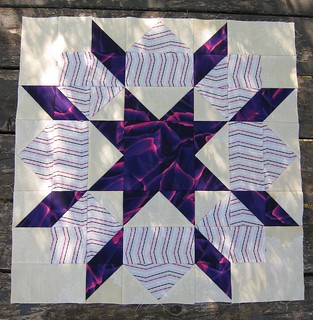
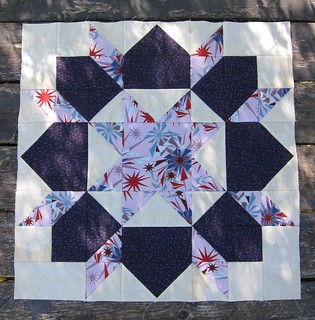
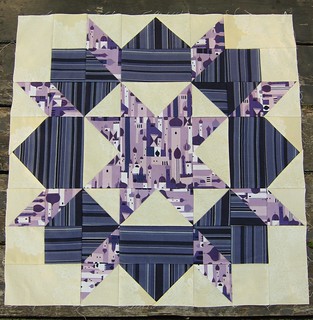
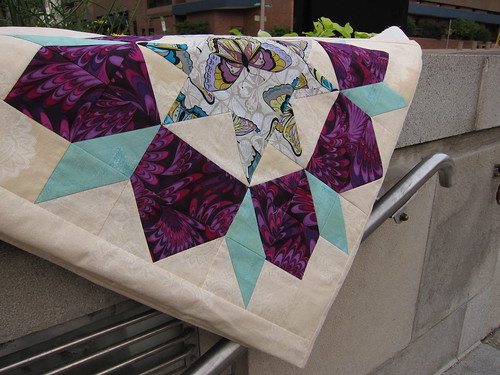
Since I'm generally an early riser, I was able to spend most of my mornings sewing while my Mr. slept in. I finished up the last four blocks and pieced them all together into a finished quilt top. Vacation weeks are the best for making big progress fast! Here are blocks 6, 7, 8 and 9.

P & B Swoon Block 6 P & B Swoon Block 7
P & B Swoon Block 8 P & B Swoon Block 9

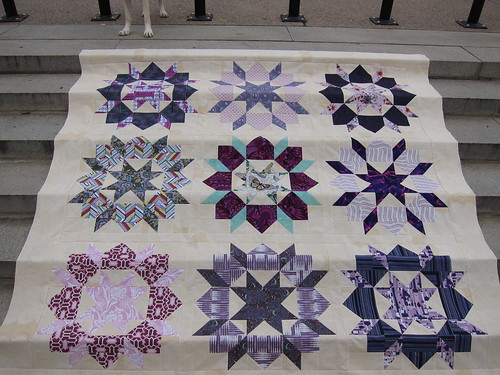
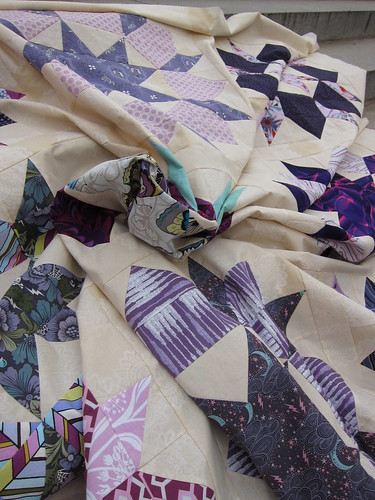
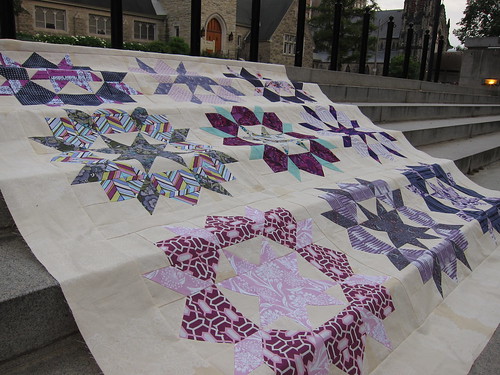
I found it very difficult to settle on a final layout and spent days agonizing over it. I even started sewing blocks together and then ripped them apart, moved things around and started again. I ended up with this and am glad I took the time to play with it until I was happy!

P & B Swoon Quilt Top

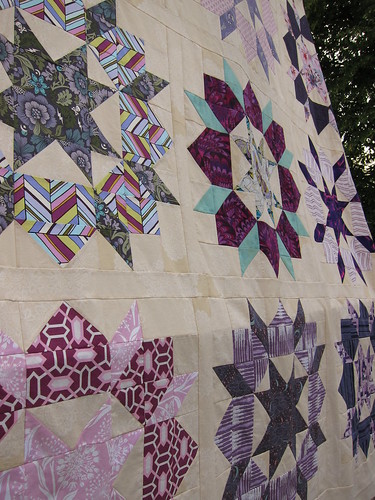
I used my original inspiration to guide the layout. The block with the most vibrant purple was placed in the centre of the quilt as a focal point and the blocks with hints of green and lighter purple were placed in the four cardinal points to help move the eye around.

P & B Swoon Quilt Top

Since I'm planning to use this quilt on a Queen sized bed and had tons of background fabric left, I decided to make a wider border to better frame the blocks. I settled on a 6.5" border all around. The finished quilt should end up at about 88" square.

P & B Swoon Quilt Top

The background fabric I'm using is an old Anna Griffin print that has a lace scallop close to the selvedge. There is a significant colour difference between the lace scallop and background. While assembling the sashing,  I made an effort to stagger the WOF joins to distribute the darker portions of the fabric throughout the quilt top.

P & B Swoon Quilt Top

I'm working on my backing now and am aiming to get this basted sometime next week.

P & B Swoon Quilt Top

Hope all of my American friends had a safe and happy 4th of July!

P & B Swoon Quilt Top